Day two
Did a little research on bell siphons (that’s a lie sorry, did a lot of research) as I wanted to use the flood and drain method. Took advice from two sources and it worked the first time. I am still amazed every time it starts and stops.
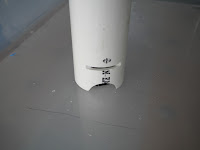
The bell auto siphon consists of 1. A vertical standpipe inside the growbed extending through the base of the growbed, 2. A larger pipe (siphon pipe) placed over the standpipe. The siphon pipe is freestanding and taller than the standpipe, and is fitted with an end cap. Additionally, the base has pieces cut out to allow free movement of water. 3. Two or three slots cut into the pipe to assist in breaking the siphon when the water level has dropped low enough.
Water flows up between the walls of both pipes then down the inside of the stand pipe, creating the siphon. When the water level drops to the intake end of the air tube, the siphon is broken.
This a length of 4” black pipe that will serve as a media guard, and allow the Bell
Here it is all put together. Very simple and reliable.
Did a test run and was amazed that it worked the first time. None of the tweaking I had anticipated.


No comments:
Post a Comment